Tilting Solutions
Artwork Tilt
When hanging from the back of a picture there will be some tilt. The amount of tilt depends on several factors such as the amount of slack in the picture wire on the back of the frame, the position of the D-Rings or screw eyes and the proportions of the artwork. We have listed several helpful tips on minimizing the tilting.
Artwork Tilt Solutions
- Add a sawtooth clip to the back side of the frame directly in the middle. Pass the suspension cable between the frame and the saw tooth clip. The Arakawa hook will be below the sawtooth clip and connecting to the picture wire on the frame. By passing the suspension wire between the frame and the sawtooth clip, it acts as a guide and changes the physics of the balance point. This method works best if you are using 3/64″ or 1/16″ cable. (See Image A)
- Move D-Rings or screw eyes on the back of frame to a higher point and use two suspension wires to hook directly to the D-Rings or screw eyes. (Don’t raise it too high or Arakawa hardware will be exposed.)(See Image B)
- Move the D-Rings or screw eyes on the frame to a higher point and tighten the picture wire. (Don’t raise it too high or Arakawa hardware will be exposed.)
- If you don’t want to adjust the position of your D-Rings or add a sawtooth clip then make sure the picture wire on the frame is pulled tight. (See Image C)

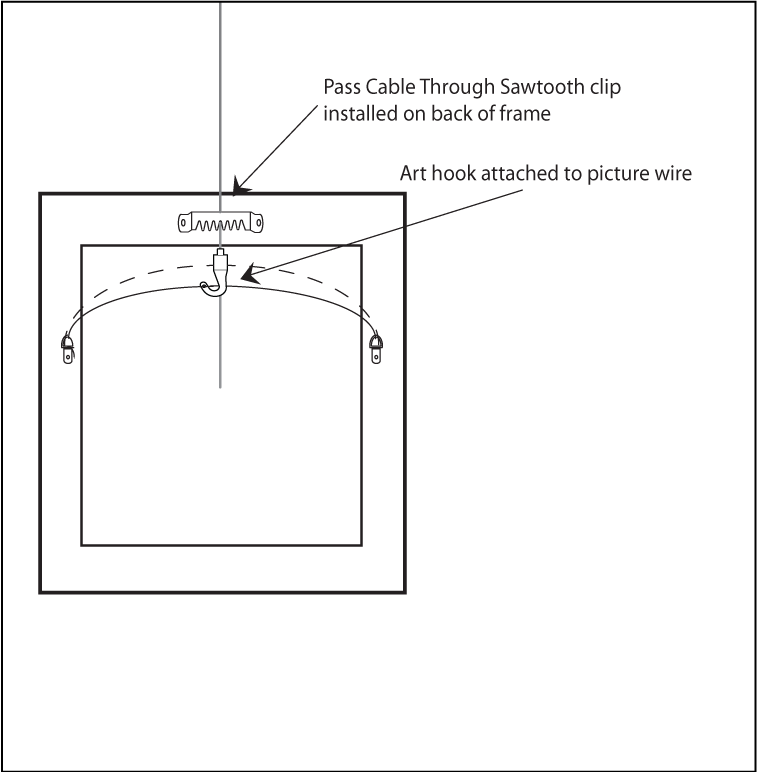
Image A
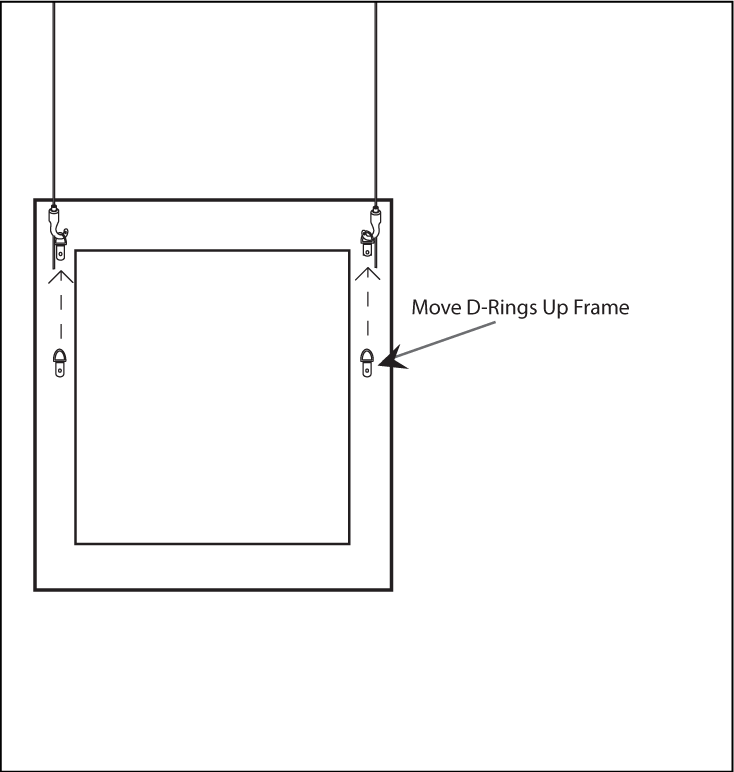
Image B
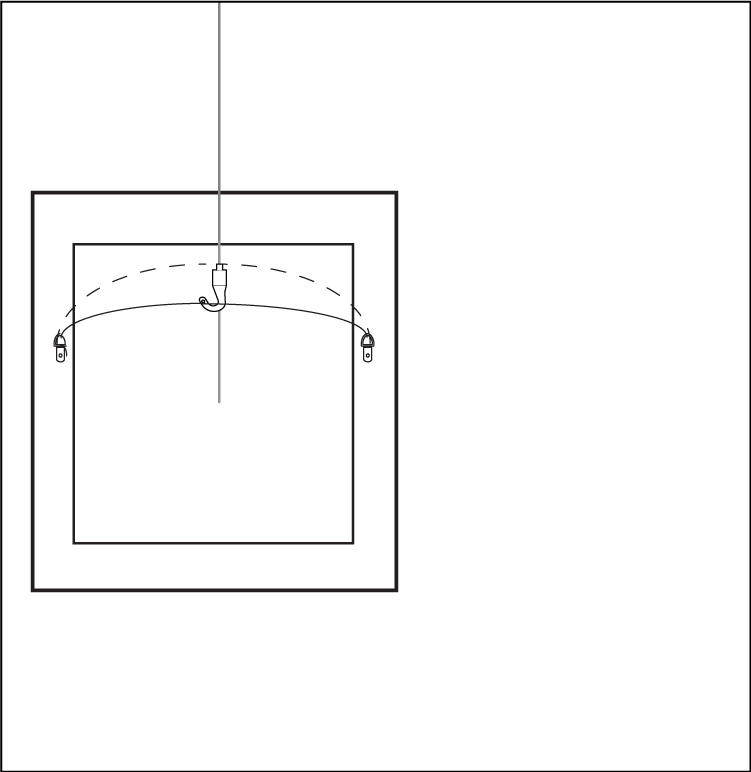
Image C
Artwork Twist
If you stack more than two pictures, you may experience twisting on a single suspension cable. (See Image D)
This can be solved by using two suspension cables instead of one cable. (See Image E)
When stacking multiple pictures we encourage your own experimentation to find the solution that works best for your pieces.
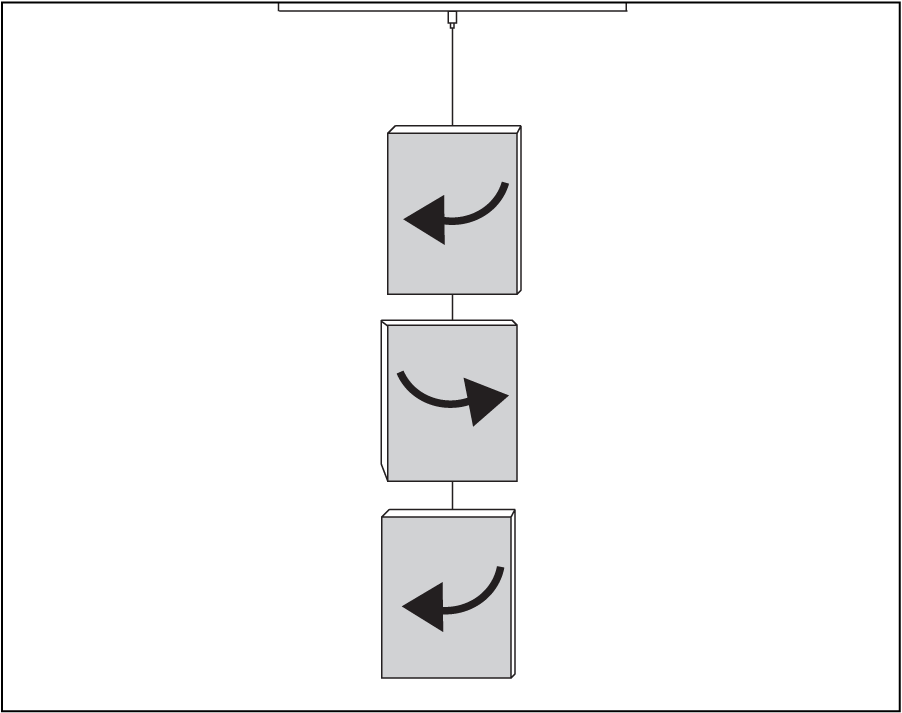
Image D
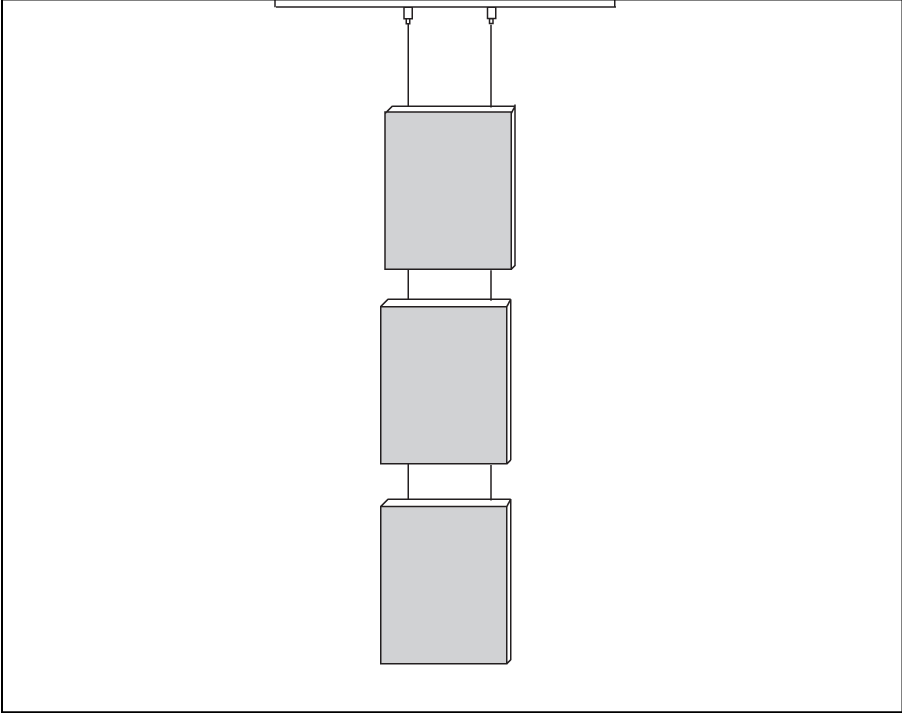
Image E
Connect with Arakawa Grip
Explore Our Solutions
undefined